
Step 1
If not already, follow Setup and Start on how to Install and get Started with Visual Studio 2017 or in Windows 10 choose Start, and then from the Start Menu locate and select Visual Studio 2017.
Step 2
Once Visual Studio Community 2017 has started, from the Menu choose File, then New then Project…

Step 3
From New Project choose Visual C# from Installed, Templates then choose Cross Platform App (Xamarin) and then type in a Name and select a Location and then select Ok to create the Project

Step 4
Then in New Cross Platform App you need to select the Blank App Template then from UI Technology select Xamarin.Forms and in Code Sharing Strategy select Shared Project and then select Ok to continue

Step 5
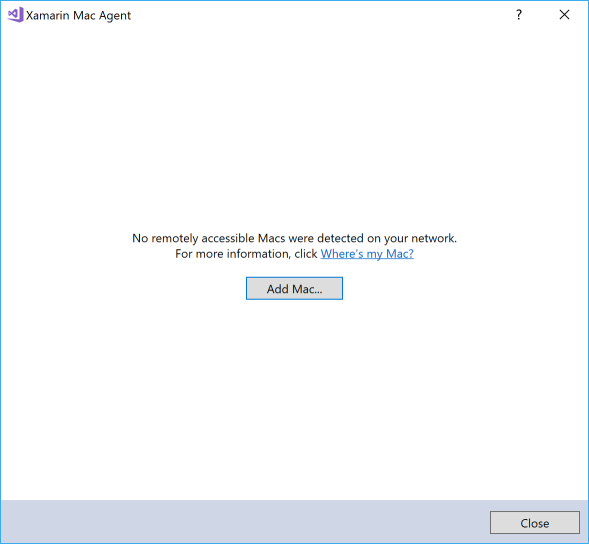
The Xamarin Mac Agent will be displayed allowing connection to an Apple Mac but this can be dismissed with Close if running solely on Windows 10
Step 6
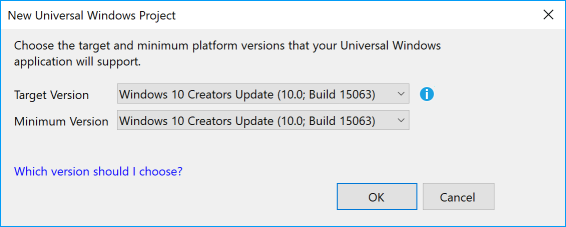
Then in New Universal Windows Project you need to select the Target Version to be Windows 10 Creators Update (10.0; Build 15063) and the Minimum Version to Windows 10 Creators Update (10.0; Build 15063) and then select Ok
Step 7
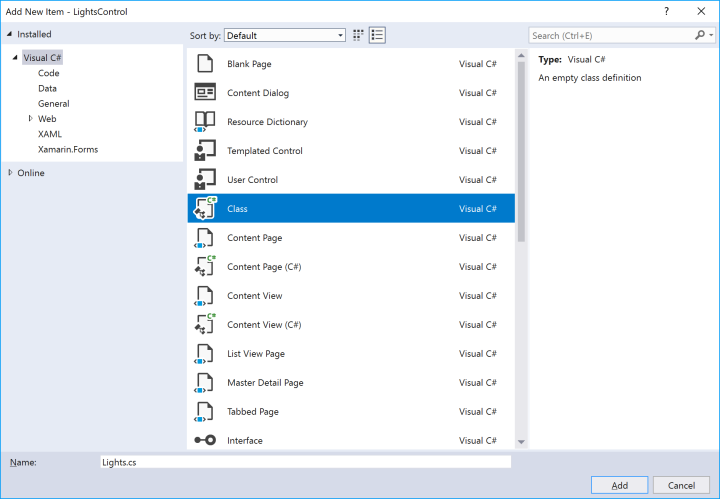
From the Menu choose Project, then Add New Item…

From the Add New Item choose Visual C# from Installed then choose Code then select Code File and then in the Name as Lights.cs and then select Add to add the file to the Project
Step 9
Then in the Code View for Lights.cs the following should be entered:
using System.Threading.Tasks;
using Xamarin.Forms;

namespace LightsControl
{
    public class Light : AbsoluteLayout
    {
        private const int rows = 8;

        private readonly int[][] table =
        {
            //  l w
            new int[] { 2, 4 },
            new int[] { 1, 6 },
            new int[] { 0, 8 },
            new int[] { 0, 8 },
            new int[] { 0, 8 },
            new int[] { 0, 8 },
            new int[] { 1, 6 },
            new int[] { 2, 4 },
        };

        private bool _isOn;

        public static readonly BindableProperty ForegroundProperty =
        BindableProperty.Create<Light, Color>(p => p.Foreground, Color.Black,
        BindingMode.Default, null, null);

        public static readonly BindableProperty ColourProperty =
        BindableProperty.Create<Light, Color>(p => p.Colour, Color.Black,
        BindingMode.Default, null, null);

        public static readonly BindableProperty SizeProperty =
        BindableProperty.Create<Light, int>(p => p.Size, 10,
        BindingMode.Default, null, null);

        public Color Foreground
        {
            get { return (Color)GetValue(ForegroundProperty); }
            set { SetValue(ForegroundProperty, value); }
        }

        public Color Colour
        {
            get { return (Color)GetValue(ColourProperty); }
            set { SetValue(ColourProperty, value); }
        }

        public int Size
        {
            get { return (int)GetValue(SizeProperty); }
            set { SetValue(SizeProperty, value); }
        }

        private Frame AddElement(int left, int top, int width, int height)
        {
            Frame frame = new Frame()
            {
                WidthRequest = width,
                HeightRequest = height,
                InputTransparent = true
            };
            Rectangle rect = new Rectangle()
            {
                Left = left,
                Top = top,
                Width = width,
                Height = height
            };
            frame.SetValue(AbsoluteLayout.LayoutBoundsProperty, rect);
            frame.SetBinding(Frame.BackgroundColorProperty, "Foreground");
            frame.BindingContext = this;
            return frame;
        }

        public Light()
        {
            for (int row = 0; row < rows; row++)
            {
                int[] factors = table[row];
                this.Children.Add(AddElement(
                    Size * factors[0],
                    row == 0 ? 0 : Size * row,
                    Size * factors[1], Size));
            }
        }

        public bool IsOn
        {
            get { return _isOn; }
            set
            {
                _isOn = value;
                Foreground = value ? Colour : Color.Black;
            }
        }
    }

    public class Lights : StackLayout
    {
        private Light _red = new Light { Colour = Color.Red };
        private Light _orange = new Light { Colour = Color.Orange };
        private Light _green = new Light { Colour = Color.Green };

        private async Task<bool> Delay(int seconds = 2)
        {
            await Task.Delay(seconds * 1000);
            return true;
        }

        public Lights()
        {
            this.Orientation = StackOrientation.Vertical;
            this.Children.Add(_red);
            this.Children.Add(_orange);
            this.Children.Add(_green);
        }

        public async void Traffic()
        {
            _red.IsOn = false;
            _orange.IsOn = false;
            _green.IsOn = true;
            await Delay();
            _green.IsOn = false;
            await Delay();
            _orange.IsOn = true;
            await Delay();
            _orange.IsOn = false;
            await Delay();
            _red.IsOn = true;
            await Delay();
            _red.IsOn = true;
            await Delay();
            _orange.IsOn = true;
            await Delay();
            _red.IsOn = false;
            _orange.IsOn = false;
            _green.IsOn = true;
            await Delay();
        }
    }
}
Step 10
In the Solution Explorer select MainPage.xaml from the Shared Project

Step 11
From the Menu choose View and then Open

Step 12
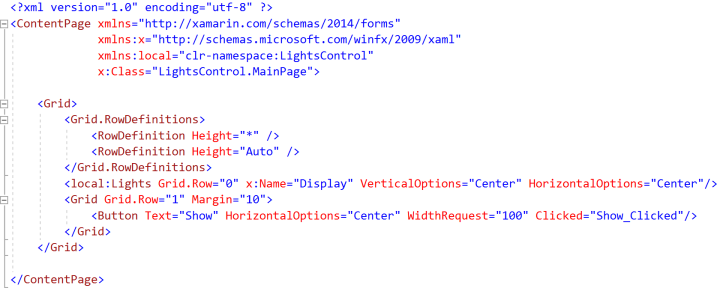
The XAML View will be displayed, and in this remove the Label then between the ContentPage and /ContentPage elements, enter the following XAML:
<Grid>
	<Grid.RowDefinitions>
		<RowDefinition Height="*" />
		<RowDefinition Height="Auto" />
	</Grid.RowDefinitions>
	<local:Lights Grid.Row="0" x:Name="Display" VerticalOptions="Center" HorizontalOptions="Center"/>
	<Grid Grid.Row="1" Margin="10">
		<Button Text="Show" HorizontalOptions="Center" WidthRequest="100" Clicked="Show_Clicked"/>
	</Grid>
</Grid>
It should appear as such:
Step 13
In the Solution Explorer select the Expand arrow next to MainPage.xaml to open MainPage.cs, then select this from the Shared Project

Step 14
From the Menu choose View and then Open
Step 15
Once in the Code View, below the public MainPage() { … } the following Code should be entered:
private void Show_Clicked(object sender, EventArgs e)
{
	Display.Traffic();
}
It should then appear as such:

Step 16
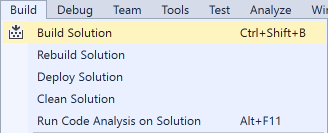
That completes the application, so from the Menu choose Build and then Build Solution
Step 17
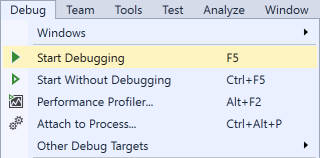
Then from the Menu choose Debug then Start Debugging to run the Application in the Android Emulator
Step 18
Once started the Application should then appear in the Android Emulator

Step 19
After the Application has started running you can then select Show to cycle through the UK traffic light sequence displayed using the Lights Control.

Step 20
To Exit the Application select Stop in Visual Studio
![]()
Step 21
Another option is to run as a Universal Windows Application. From Solution Explorer select the Project ending with .UWP (Universal Windows), then from the Menu choose Project then Set as StartUp Project

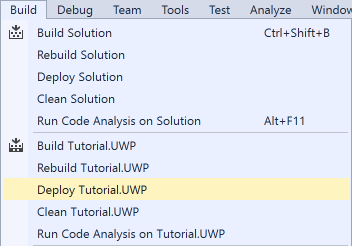
Step 22
Then again from the Menu choose Build and then select the Deploy option ending with .UWP
Step 23
Then once again from the Menu choose Debug then Start Debugging to run the Application in Windows 10
Step 24
Once started the Application should then appear

Step 25
After the Application has started running you can then select Show to cycle through the UK traffic light sequence displayed using the Lights Control.

Step 26
To Exit the Application select Stop in Visual Studio
![]()
Step 27
Also if you have Mac with the Xamarin tools installed and have enabled and connected to the Xamarin Mac Agent. From Solution Explorer select the Project ending with .iOS, then from the Menu choose Project then Set as StartUp Project
Step 28
Then once again from the Menu choose Debug then Start Debugging to run the Application for iOS
Step 29
Once started the Application should then appear

Step 30
After the Application has started running you can then select Show to cycle through the UK traffic light sequence displayed using the Lights Control.

Step 31
To Exit the Application select Stop in Visual Studio
![]()
Thanks for Julia Boichentsova for helping with iOS screenshots

